Manual
Currently being written...
This manual is incomplete and a bit unorganized, my apologies! I greatly underestimated the amount of time it takes to create a good manual, and a more comprehensive version is in the works.
In the meantime, the content in this manual helps with many common questions, and the built-in reference is great for understanding individual parameters and settings.
If you can't find what you're looking for though, I'd recommend checking out Gavinski's Tutorials for a great video walkthrough series, and of course, feel free to send me an email and I'd be happy to help.
Main Interface
This is the Main Interface:
The Main Interface is the lowest interface level of the application.
More Button
This is the More Button:
Tapping the More Button presents popover pages for the Patterns library, Snapshots, App Settings, and App Info.
Shift Buttons
There are 2 shift buttons on the main interface:
The shift buttons are used to provide alternate functionality throughout the system.
Interacting with these buttons directly is only useful with multi-touch — i.e. on iPad and iPhone.
When interacting with with a cursor and qwerty keyboard, the shift buttons are controlled using the keyboard's option, control, and shift keys. When you hold those keys on your qwerty keyboard, the shift buttons on the main interface will show as pressed.
There are 3 shift states: Single Shift, Double Shift, and Triple Shift.
Applying Shift
- iOS
- macOS
As long as your finger stays on the screen after touching a shift button, the finger will count towards the shift state. This is especially useful when using one shift button to achieve Double Shift or Triple Shift as it allows you to move your fingers away from the button to make room for the others.
Single Shift
- One-finger-touch on either shift button.
Double Shift
- METHOD 1 — two-finger-touch on either shift button.
- METHOD 2 — one-finger-touch on both shift buttons.
Triple Shift
- METHOD 1 — three-finger-touch on either shift button.
- METHOD 2 — two-finger-touch on one shift button, and one-finger-touch on the other.
Note Grid
This is the Note Grid:

The Note Grid is home to Sequence Notes and enabled Note Playheads. Interactions on the Note Grid only affect the Sequence Notes.
Note Grid Interactions
- iOS
- macOS
Create a note
- METHOD 1 — one-finger-tap on an empty step.
- METHOD 2 — one-finger-touch on an empty step, then pan-right.
If you apply Shift while creating a new note, any selected notes will remain selected. Otherwise, selected notes become unselected.
Initiate selection window
- One-finger-touch an empty step, then pan in any direction other than right.
Select notes
- METHOD 1 — initiate selection window, then pan over the notes you want to select.
- METHOD 2 — apply Single Shift, then one-finger-tap the notes you want to select/deselect.
Delete notes
- One-finger-tap on a note.
If the note is selected and there's more than 1 note selected, a confirmation alert is presented.
Move notes
-
METHOD 1 — one-finger-touch a note, then pan.
If you initiate this interaction by panning right on the note's right edge, you'll change note length. To avoid this, you can start towards the left side of the note, or start by panning in any direction other than right.
-
METHOD 2 — select the note(s) you want to pan, two-finger-touch anywhere on the note-grid, then pan.
Duplicate notes
- METHOD 1 — apply Single Shift, one-finger-touch a note, then pan.
- METHOD 2 — select the note(s) you want to duplicate, apply Single Shift, two-finger-touch anywhere on the note-grid, then pan.
Change note length
- METHOD 1 — one-finger-touch the right side of any note, then pan-right.
- METHOD 2 — select the note(s) you want to affect, then three-finger-pan left-and-right anywhere on the note-grid
Change note velocity
- Select the note(s) you want to affect, then three-finger-pan up-and-down anywhere on the note-grid.
Create a note
- METHOD 1 — click on an empty step.
- METHOD 2 - press on an empty step, then pan-right.
If you apply Single Shift while creating a new note, any selected notes will remain selected. Otherwise, selected notes become unselected.
Initiate selection window
- Press on an empty step, then pan in any direction other than right.
Select notes
- METHOD 1 — initiate selection window, then pan over the notes you want to select.
- METHOD 2 — apply Single Shift, then click on the notes you want to select/deselect.
Delete notes
- Click on a note.
If the note is selected and there's more than 1 note selected, a confirmation alert is presented.
Move notes
-
METHOD 1 — press on any note, then pan.
If you initiate this interaction by panning left-or-right on the note's right edge, you'll change note length. To avoid this, you can start towards the left side of the note, or start by panning in any direction other than left-or-right.
-
METHOD 2 — select the note(s) you want to pan, hold the command-key, press anywhere on the note-grid, then pan.
Duplicate notes
- METHOD 1 — apply Single Shift, press on any note, then pan.
- METHOD 2 — select the note(s) you want to duplicate, hold the command-key, apply Single Shift, press anywhere on the note-grid, then pan.
Change note length
- METHOD 1 — press on the right side of any note, then pan-right.
- METHOD 2 — select the note(s) you want to affect, hold the command-key, press anywhere on the note-grid, then pan-left-or-right.
Change note velocity
- METHOD 1 — apply Double Shift, press on any note, then pan-up-and-down.
- METHOD 2 — select the note(s) you want to affect, apply Double Shift, hold the command-key, press anywhere on the note-grid, then pan-up-and-down.
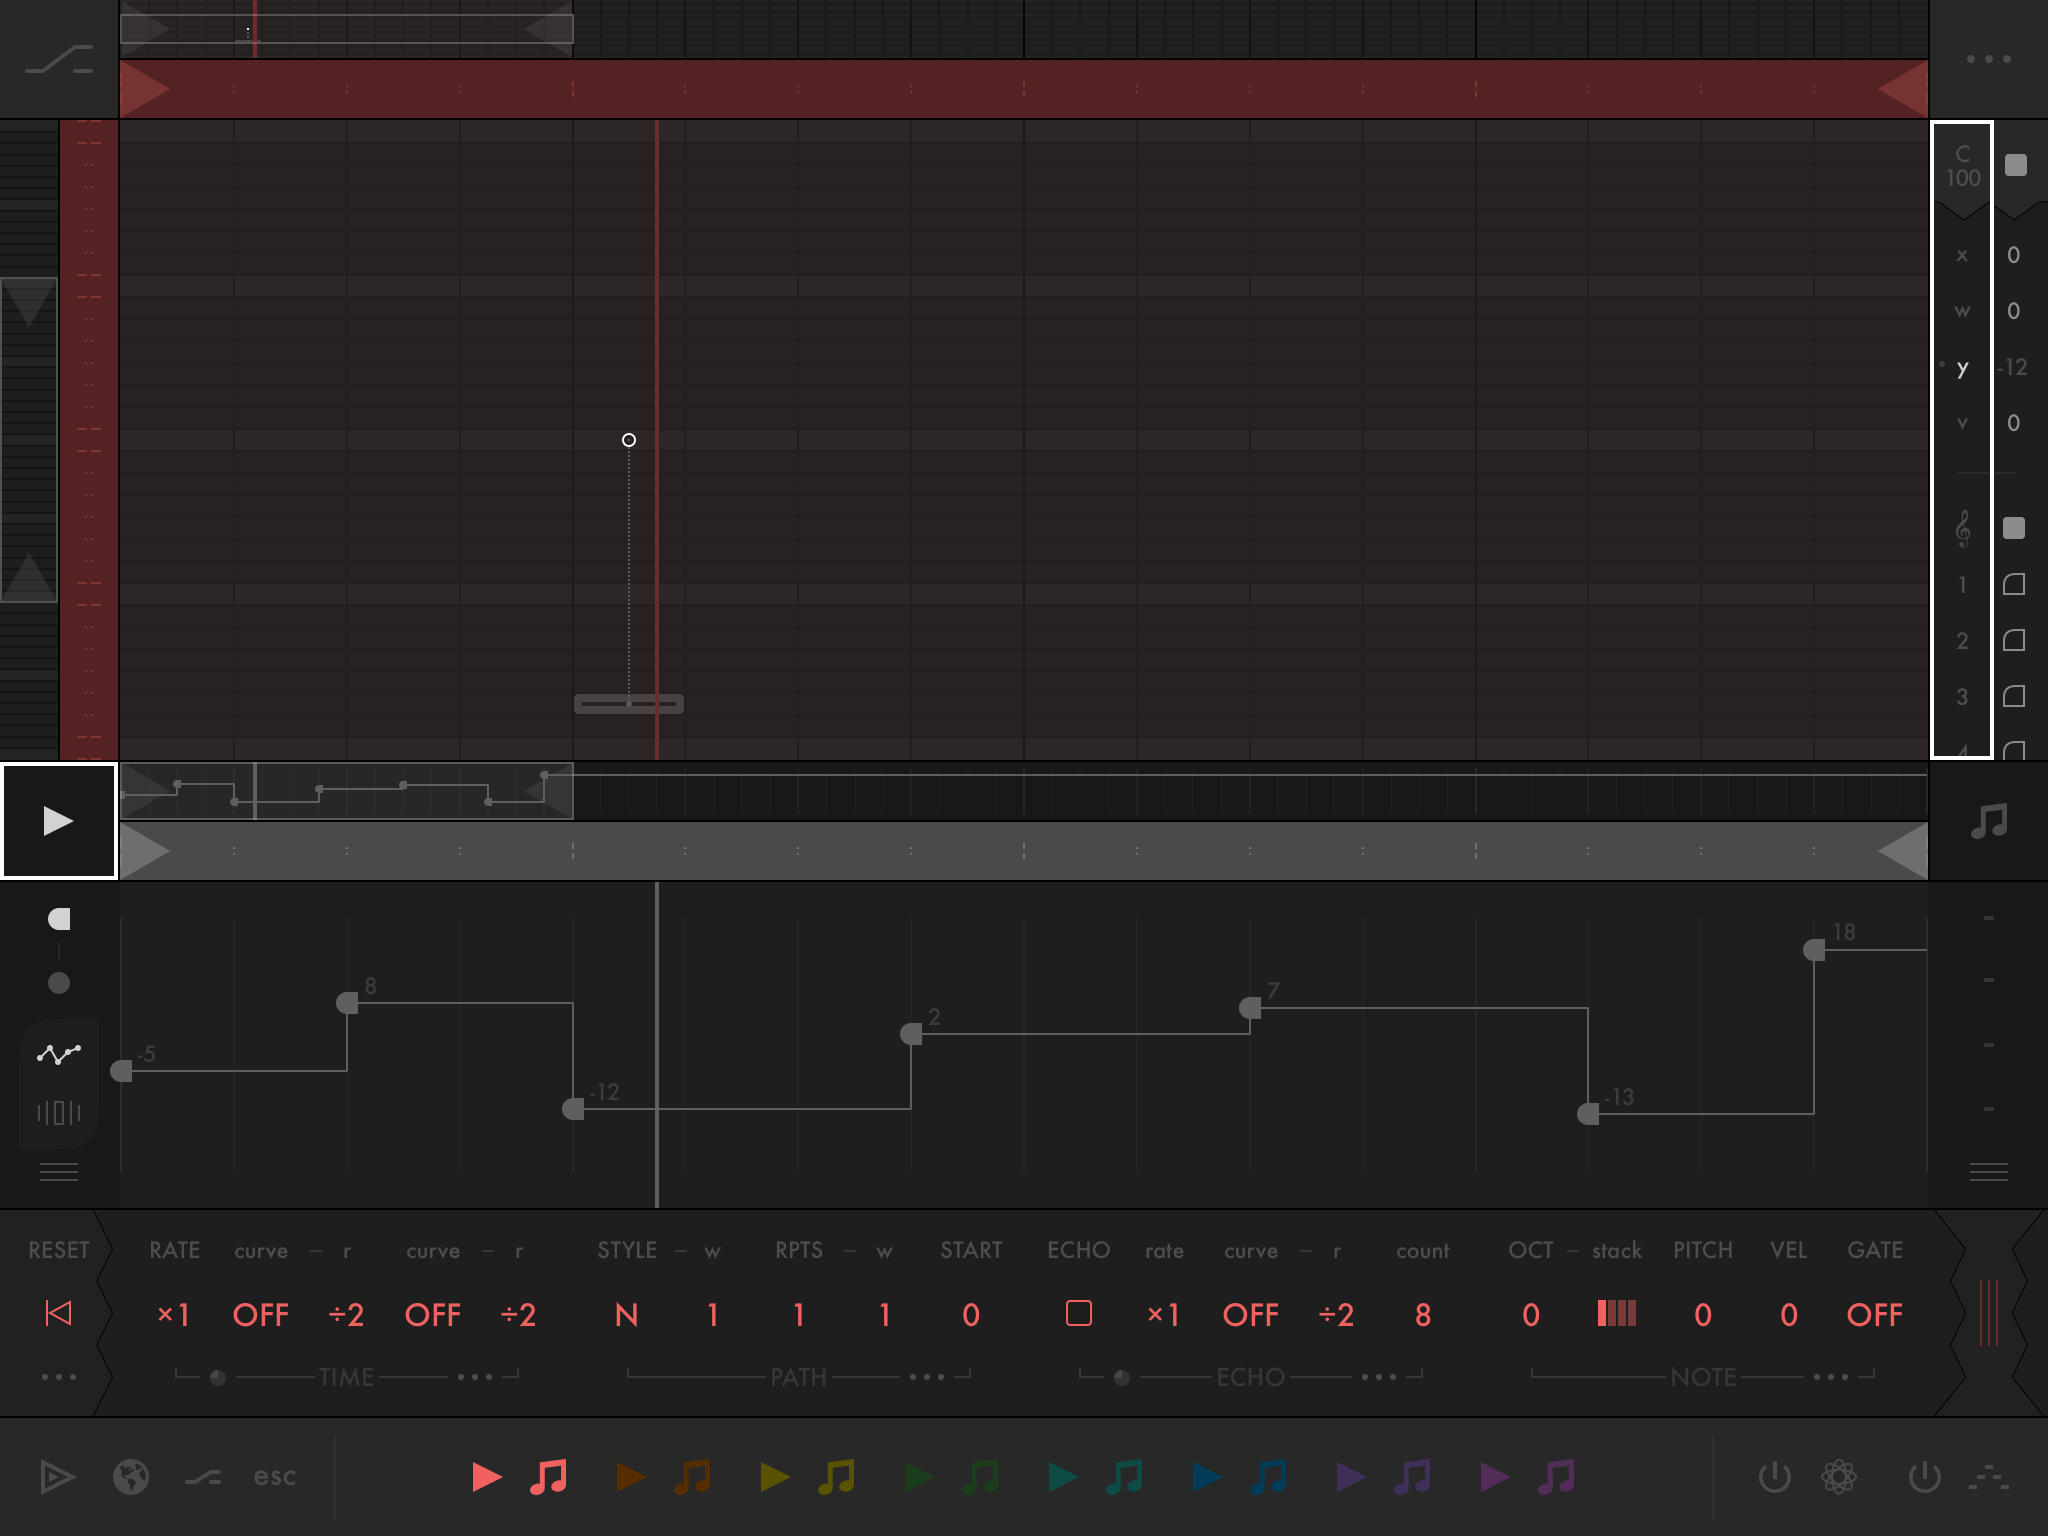
Point Grid
This is the Point Grid:
The Point Grid is home to Points, Segments (the lines between Points), and an Automation Playhead. Interactions on the Point Grid only affect the Points and Segments.
Point Grid Interactions
- iOS
- macOS
Create a point
- One-finger-tap on a step-line.
If there's already a point on a line, tap to the right of the line to position the new point after the existing point, or tap to the left of the line to position the new point before the existing point. Each step-line can have up to 2 points.
If you apply Shift while creating a new point, any selected points will remain selected. Otherwise, selected points become unselected.
Initiate selection window
- One-finger-touch on an empty location, then pan.
Select points
- METHOD 1 - initiate selection window, then pan over the points you want to select.
- METHOD 2 — apply Shift, then one-finger-tap on the points you want to select/deselect.
Select a segment
- Select any two adjacent points.
Delete point
- One-finger-tap on a point.
If the point is selected and there's more than 1 point selected, a confirmation alert is presented.
Move points
- METHOD 1 — one-finger-touch a point, then pan.
- METHOD 2 — select the point(s) you want to pan, two-finger-touch anywhere on the point-grid, then pan.
- METHOD 3 — select the point(s) you want to pan, then in the view to the right of the point-grid, adjust the topmost parameter.
Duplicate points
- METHOD 1 — apply Single Shift, one-finger-touch a point, then pan.
- METHOD 2 — select the point(s) you want to duplicate, apply Single Shift, two-finger-touch anywhere on the point-grid, then pan.
- METHOD 3 — select the point(s) you want to duplicate, apply Single Shift, then in the view to the right of the point-grid, adjust the topmost parameter.
Change segment curve
- METHOD 1 — select a segment, three-finger-touch anywhere on the point-grid, then pan left-and-right.
- METHOD 2 — select a segment, then in the view to the right of the point-grid, adjust the parameter that's 2nd from the top.
- If you increase curve all the way to the right, the previous point becomes locked, creating a horizontal line.
Change segment shape amount
- METHOD 1 — select a segment, three-finger-touch anywhere on the point-grid, then pan up-and-down.
- METHOD 2 — select a segment, then in the view to the right of the point-grid, adjust the parameter that's 3rd from the top.
Change segment shape rate
- Select a segment, then in the view to the right of the point-grid, adjust the parameter that's 4th from the top.
Change segment shape type
- Select a segment, then in the view to the right of the point-grid, adjust the parameter that's 5th from the top.
Change segment shape phase
- Select a segment, then in the view to the right of the point-grid, adjust the parameter that's 6th from the top.
Change segment shape frequency modulation
- METHOD 1 — select a segment, apply Single Shift, three-finger-touch anywhere on the point-grid, then pan left-and-right.
- METHOD 2 — select a segment, then in the view to the right of the point-grid, adjust the parameter that's 7th from the top.
Change segment shape amplitude modulation
- METHOD 1 — select a segment, apply Single Shift, three-finger-touch anywhere on the point-grid, then pan up-and-down.
- METHOD 2 — select a segment, then in the view to the right of the point-grid, adjust the parameter that's 8th from the top.
Create a point
- Click on a step-line.
If there's already a point on a line, tap to the right of the line to position the new point after the existing point, or tap to the left of the line to position the new point before the existing point. Each step-line can have up to 2 points.
If you apply Shift while creating a new point, any selected points will remain selected. Otherwise, selected points become unselected.
Initiate selection window
- Press on an empty location, then pan.
Select points
- METHOD 1 — initiate selection window, then pan over the points you want to select.
- METHOD 2 — apply Single Shift, then click on the points you want to select/deselect.
Select a segment
- Select any two adjacent points.
The line between two points is called a "segment". It becomes brighter when selected.
Delete points
- Click on a point.
If the point is selected and there's more than 1 point selected, a confirmation alert is presented.
Move points
- METHOD 1 — press on any point, then pan.
- METHOD 2 — select the point(s) you want to pan, hold the command-key, press anywhere on the point-grid, then pan.
- METHOD 3 — select the point(s) you want to pan, then in the view to the right of the point-grid, adjust the topmost parameter.
Duplicate points
- METHOD 1 — apply Single Shift, press on any point, then pan.
- METHOD 2 — select the point(s) you want to duplicate, hold the command-key, apply Single Shift, press anywhere on the point-grid, then pan.
- METHOD 3 — select the point(s) you want to duplicate, apply Single Shift, then in the view to the right of the point-grid, adjust the topmost parameter.
Change segment curve
- METHOD 1 — select a segment, apply Double Shift, press on one of the segment's points, then pan left-and-right.
- METHOD 2 — select a segment, apply Double Shift, hold the command-key, press anywhere on the point-grid, then pan left-and-right.
- METHOD 3 — select a segment, then in the view to the right of the point-grid, adjust the parameter that's 2nd from the top.
Change segment shape amount
- METHOD 1 — select a segment, apply Double Shift, press on one of the segment's points, then pan up-and-down.
- METHOD 2 — select a segment, apply Double Shift, hold the command-key, press anywhere on the point-grid, then pan up-and-down.
- METHOD 3 — select a segment, then in the view to the right of the point-grid, adjust the parameter that's 3rd from the top.
Change segment shape rate
- Select a segment, then in the view to the right of the point-grid, adjust the parameter that's 4th from the top.
Change segment shape type
- Select a segment, then in the view to the right of the point-grid, adjust the parameter that's 5th from the top.
Change segment shape phase
- Select a segment, then in the view to the right of the point-grid, adjust the parameter that's 6th from the top.
Change segment shape frequency modulation
- METHOD 1 — select a segment, apply Triple Shift, press on one of the segment's points, then pan left-and-right.
- METHOD 2 — select a segment, apply Triple Shift, hold the command-key, press anywhere on the point-grid, then pan left-and-right.
- METHOD 3 — select a segment, then in the view to the right of the point-grid, adjust the parameter that's 7th from the top.
Change segment shape amplitude modulation
- METHOD 1 — select a segment, apply Triple Shift, press on one of the segment's points, then pan up-and-down.
- METHOD 2 — select a segment, apply Triple Shift, hold the command-key, press anywhere on the point-grid, then pan up-and-down.
- METHOD 3 — select a segment, then in the view to the right of the point-grid, adjust the parameter that's 8th from the top.
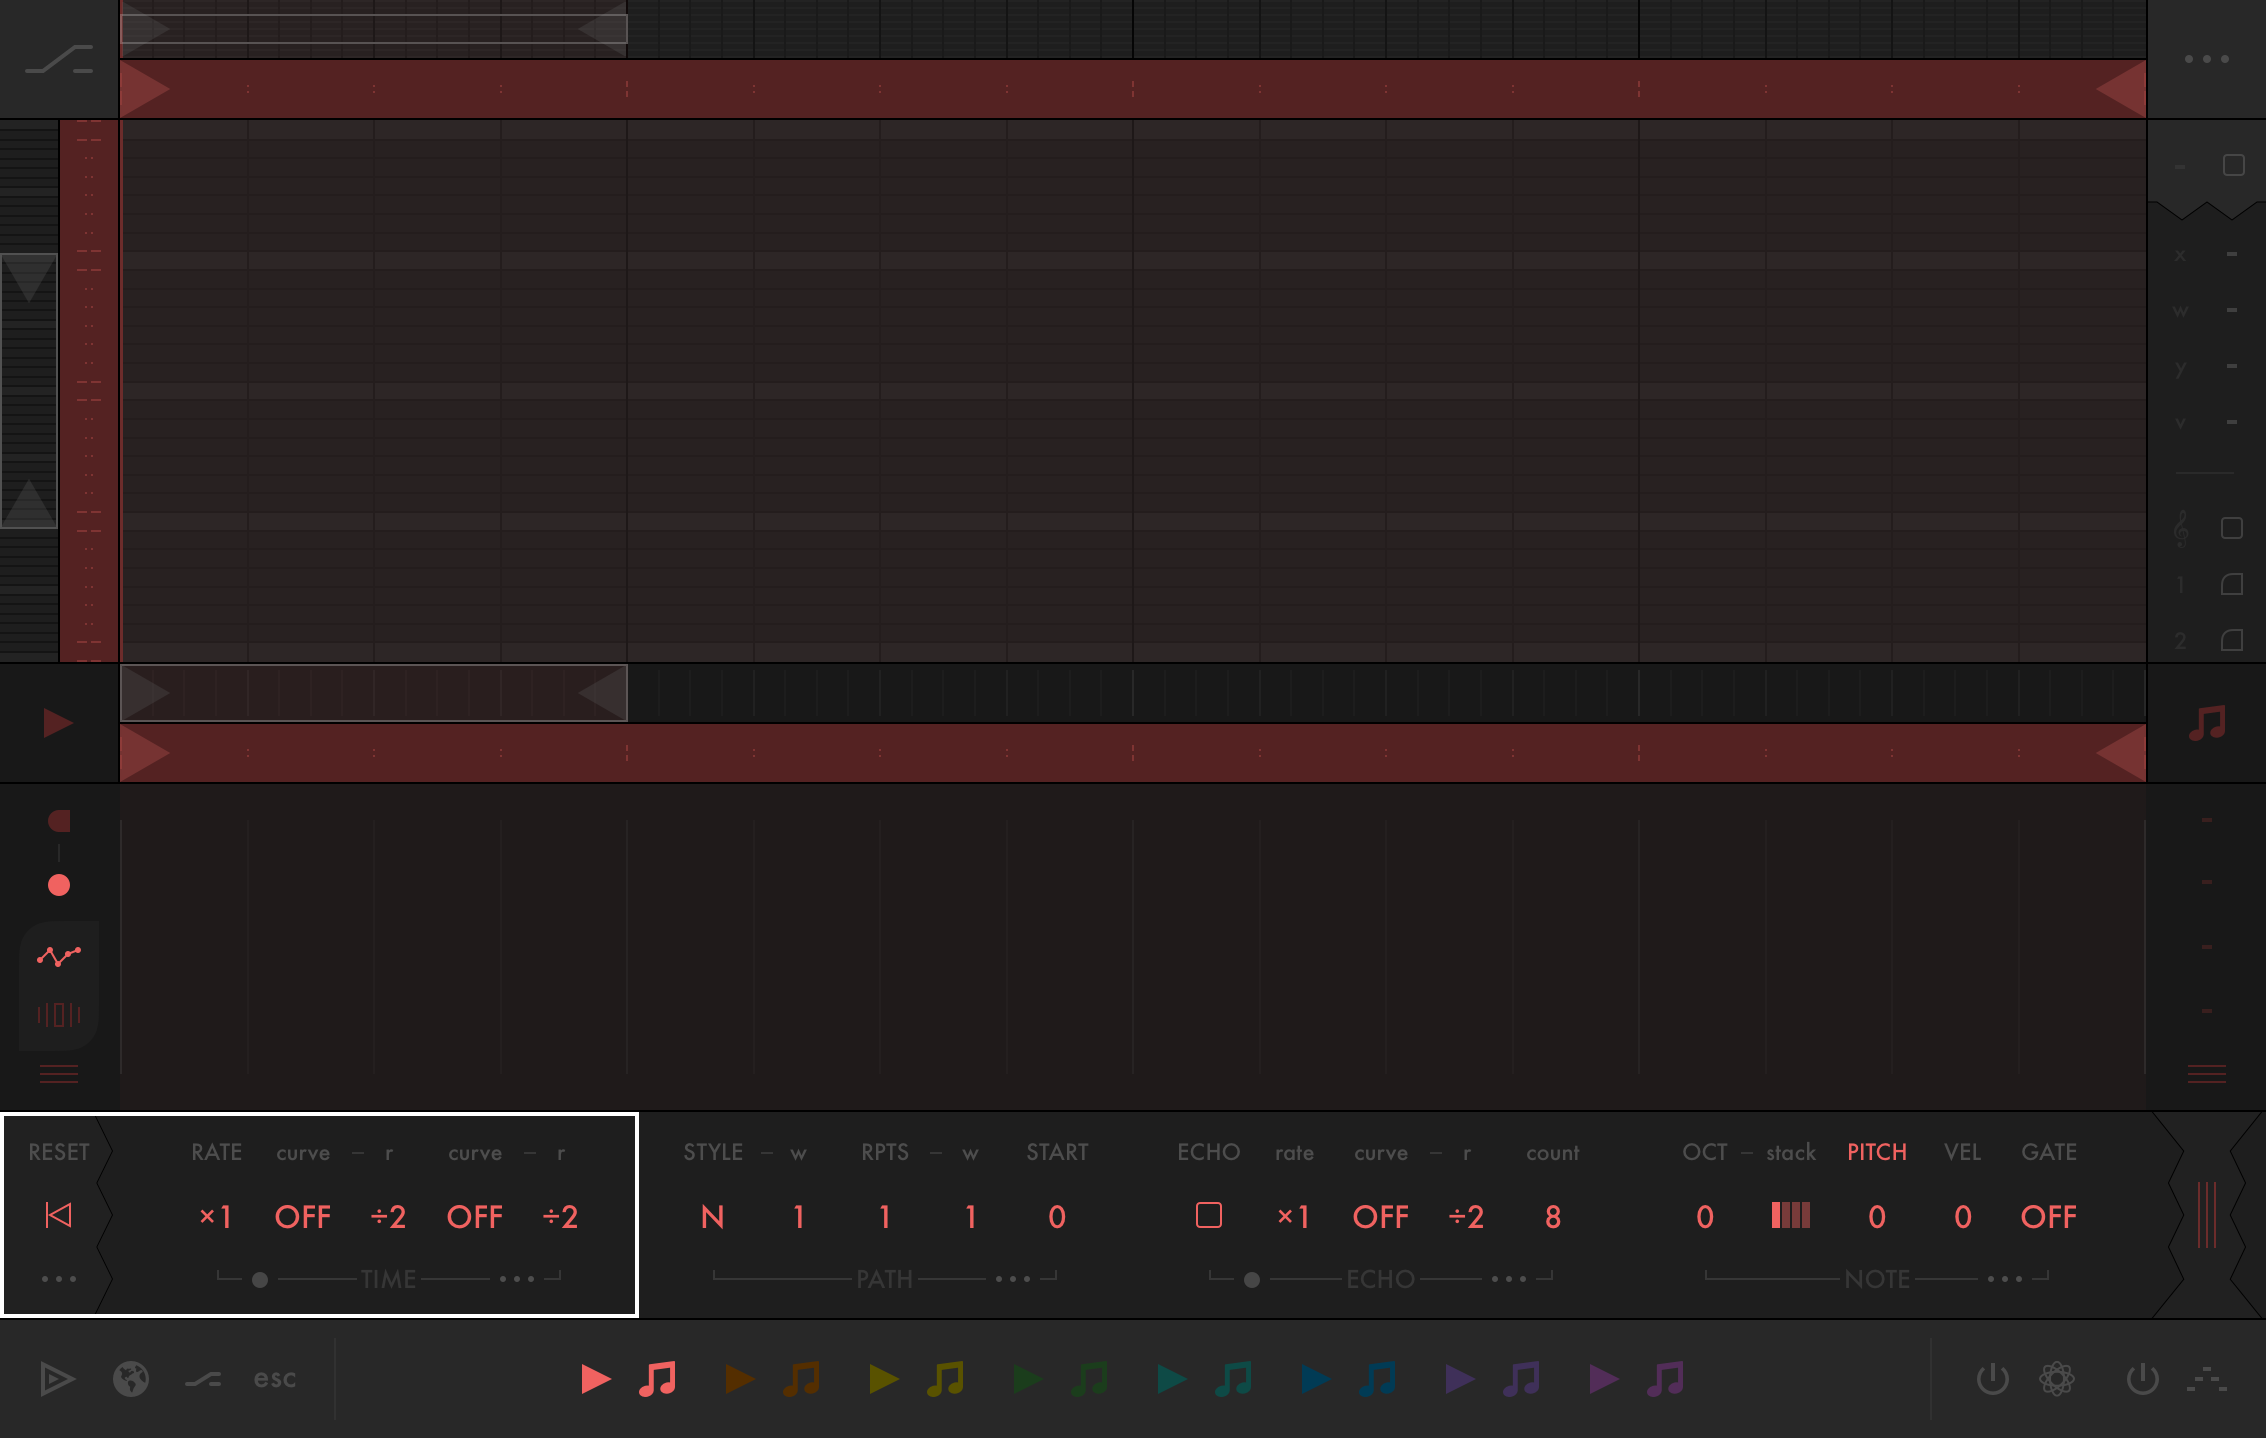
Time Parameters
Each playhead and effect has parameters that affect how its time advances.
Reset
Resets time to zero.
Time Direction
Sets the direction of time to forward, reverse, or freeze.
Rate
Multiplies and divides time.
Includes whole, dotted, and triplet values relative to master tempo, as well subparameters to multiply and divide by integers.
Curve 1-2
Accelerates and decelerates time using preset curve shapes.
Select between 50 curve shapes. These include varying degrees of natural easing curves (great for strumming and swing), as well as more experimental curves that bounce, move elastically, and more.
Curve Rate 1-2
Sets the speed at which the associated curve takes to complete a cycle.
Similar to Rate, Curve Rate includes whole, dotted, and triplet values relative to master tempo, as well subparameters to multiply and divide by integers.
Offset 1-5
Add, subtract, and automate time.
Apply offsets statically to shift a time forward and back by set amounts, or automate offsets to draw your own time curves and playback paths.
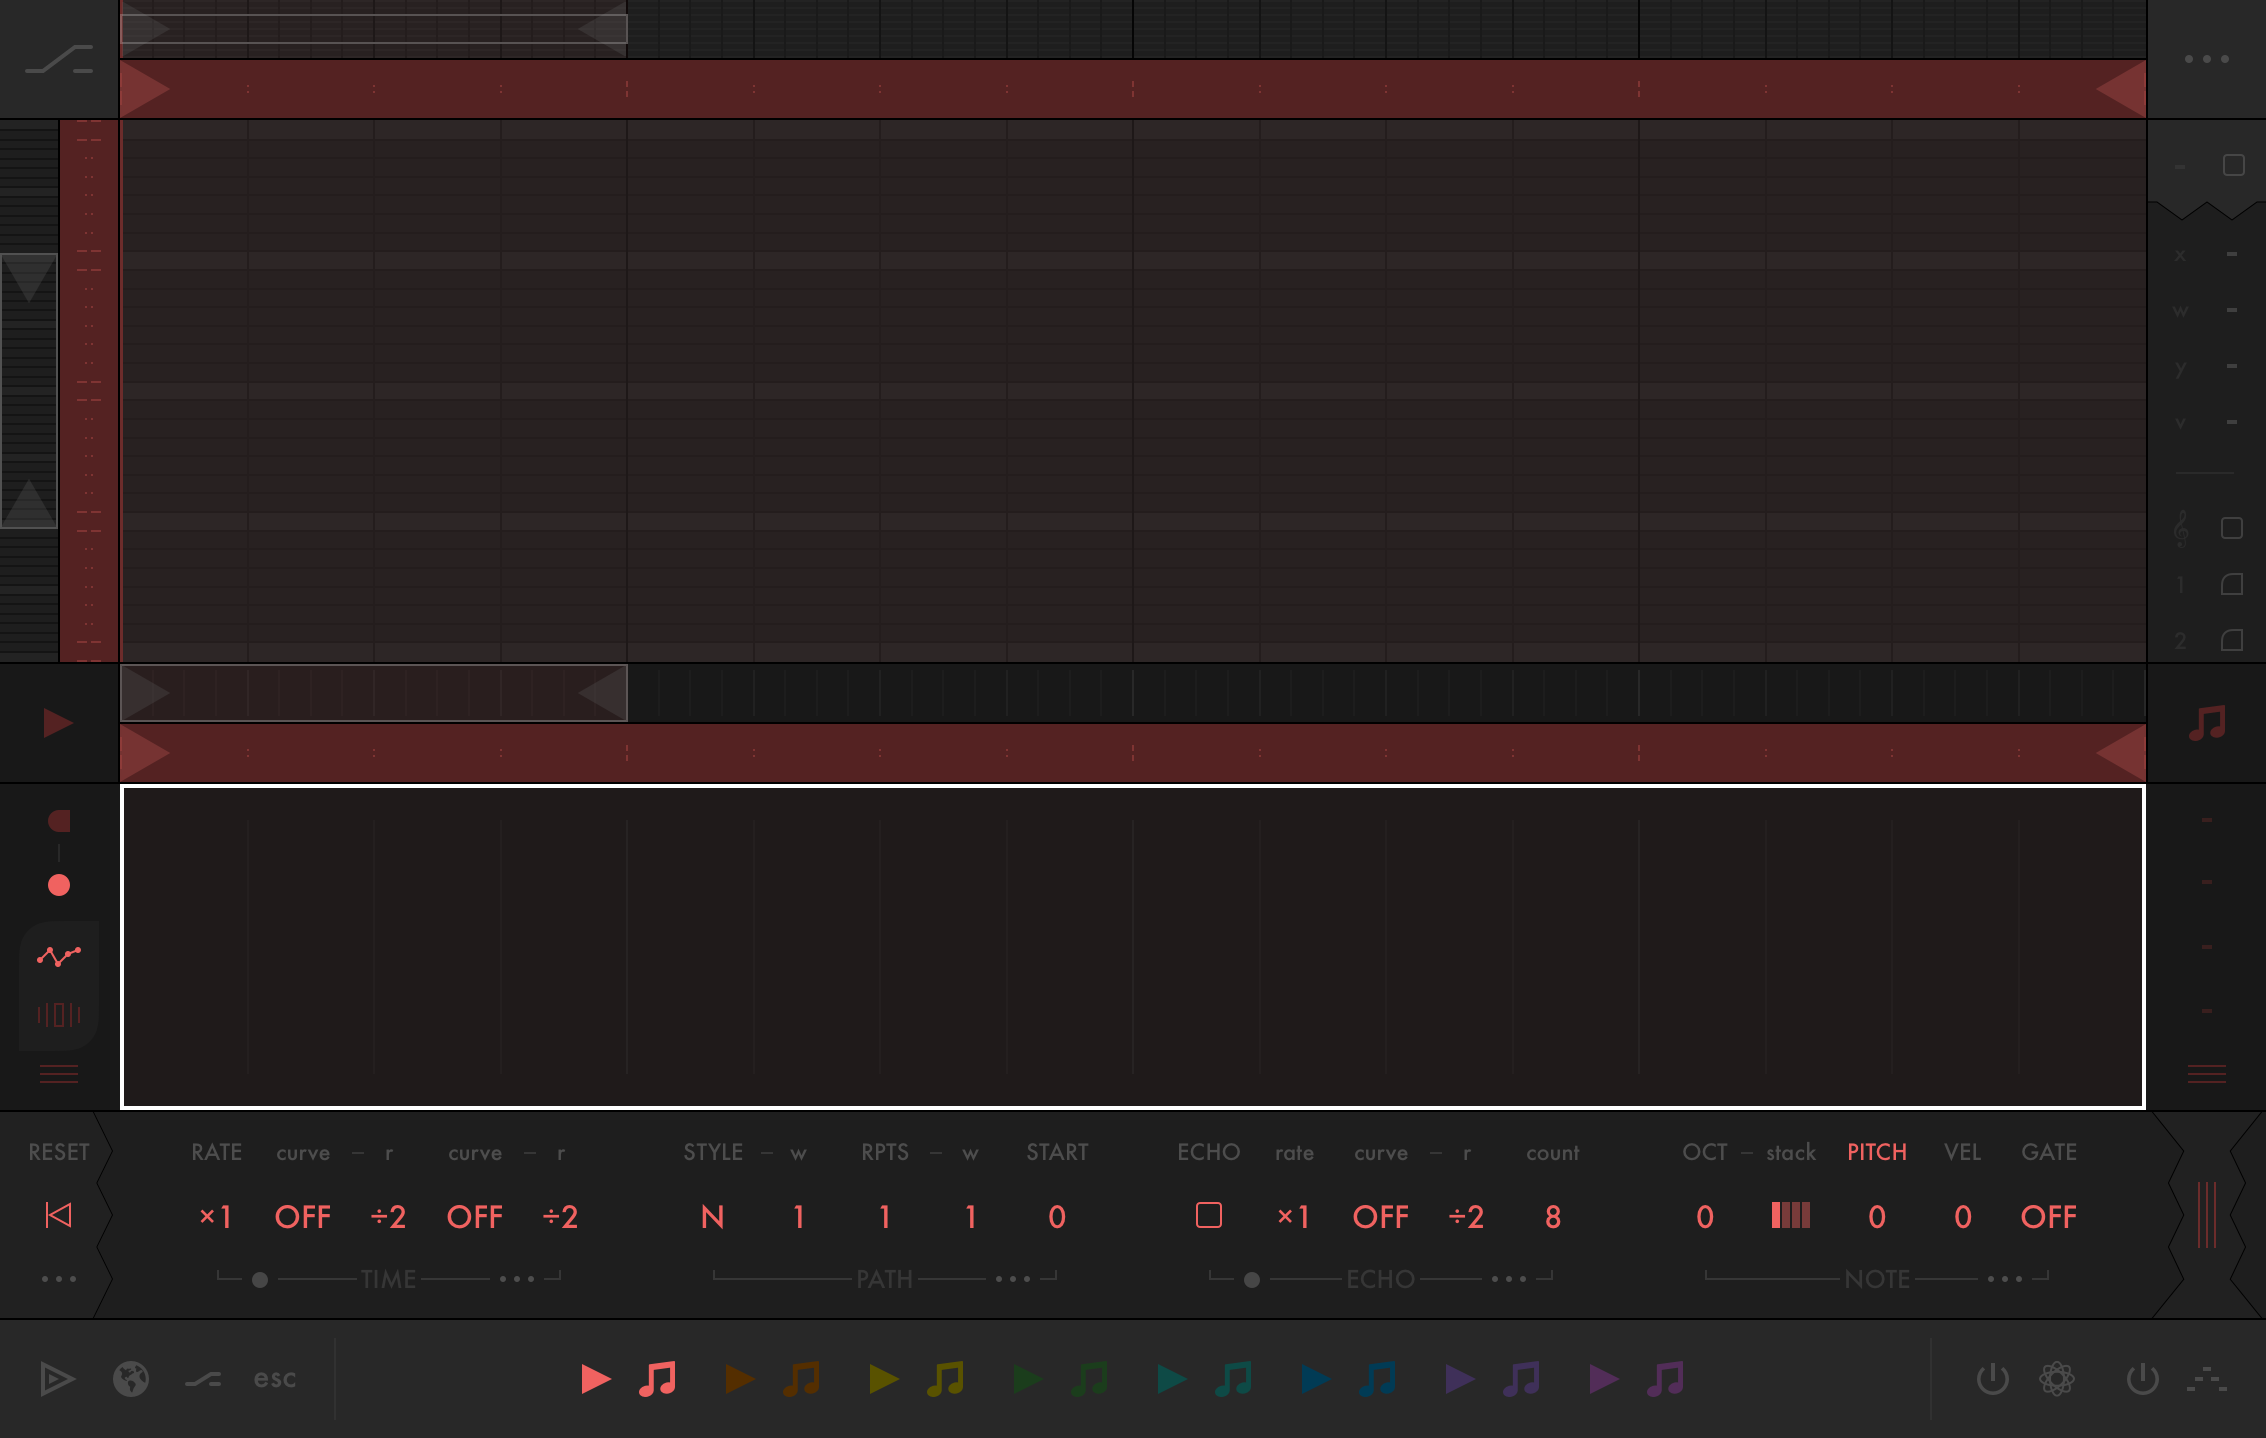
Note Parameter View
This is the Note Parameter View:
The Note Parameter View is home to parameters for selected Sequence Notes on the Note Grid. Parameters here are disabled when no Sequence Notes are selected. To automate one of these parameters, only 1 Sequence Note can be selected.
Note Enabled
Sets it the note will be triggered or ignored by playheads that pass over it.
X Offset
Offsets the Sequence Note's horizontal position in the Note Grid.
Y Offset
Offsets the Sequence Note's vertical position in the Note Grid.
Width Offset
Offsets the Sequence Note's width in the Note Grid.
Velocity Offset
Offsets the Sequence Note's velocity.
Note that this is an offset, not the Sequence Note's base velocity value. To set the Sequence Note's base velocity value, please see Note Grid Interactions.
Pitch Enabled
Sets whether or not the Sequence Note is "pitch-enabled".
If a Sequence Note is pitch-enabled, notes that are generated from it can be sent to the MIDI Outs. If a Sequence Note is not pitch-enabled, notes are still generated from it, but they will not be sent to MIDI Outs
Setting Pitch Enabled to OFF is especially useful if you'd like a Sequence Note to only send Drum Trigs, or if you'd like to add silent steps to the Arpeggiator.
Drum Trig 1-16 Enabled
Sets whether or not the Sequence Note is drumTrig[1-16]-enabled. See Drum Trigs for more.
Built-In Reference
There's built-in reference for parameters, settings, and more — presented contextually via popovers.
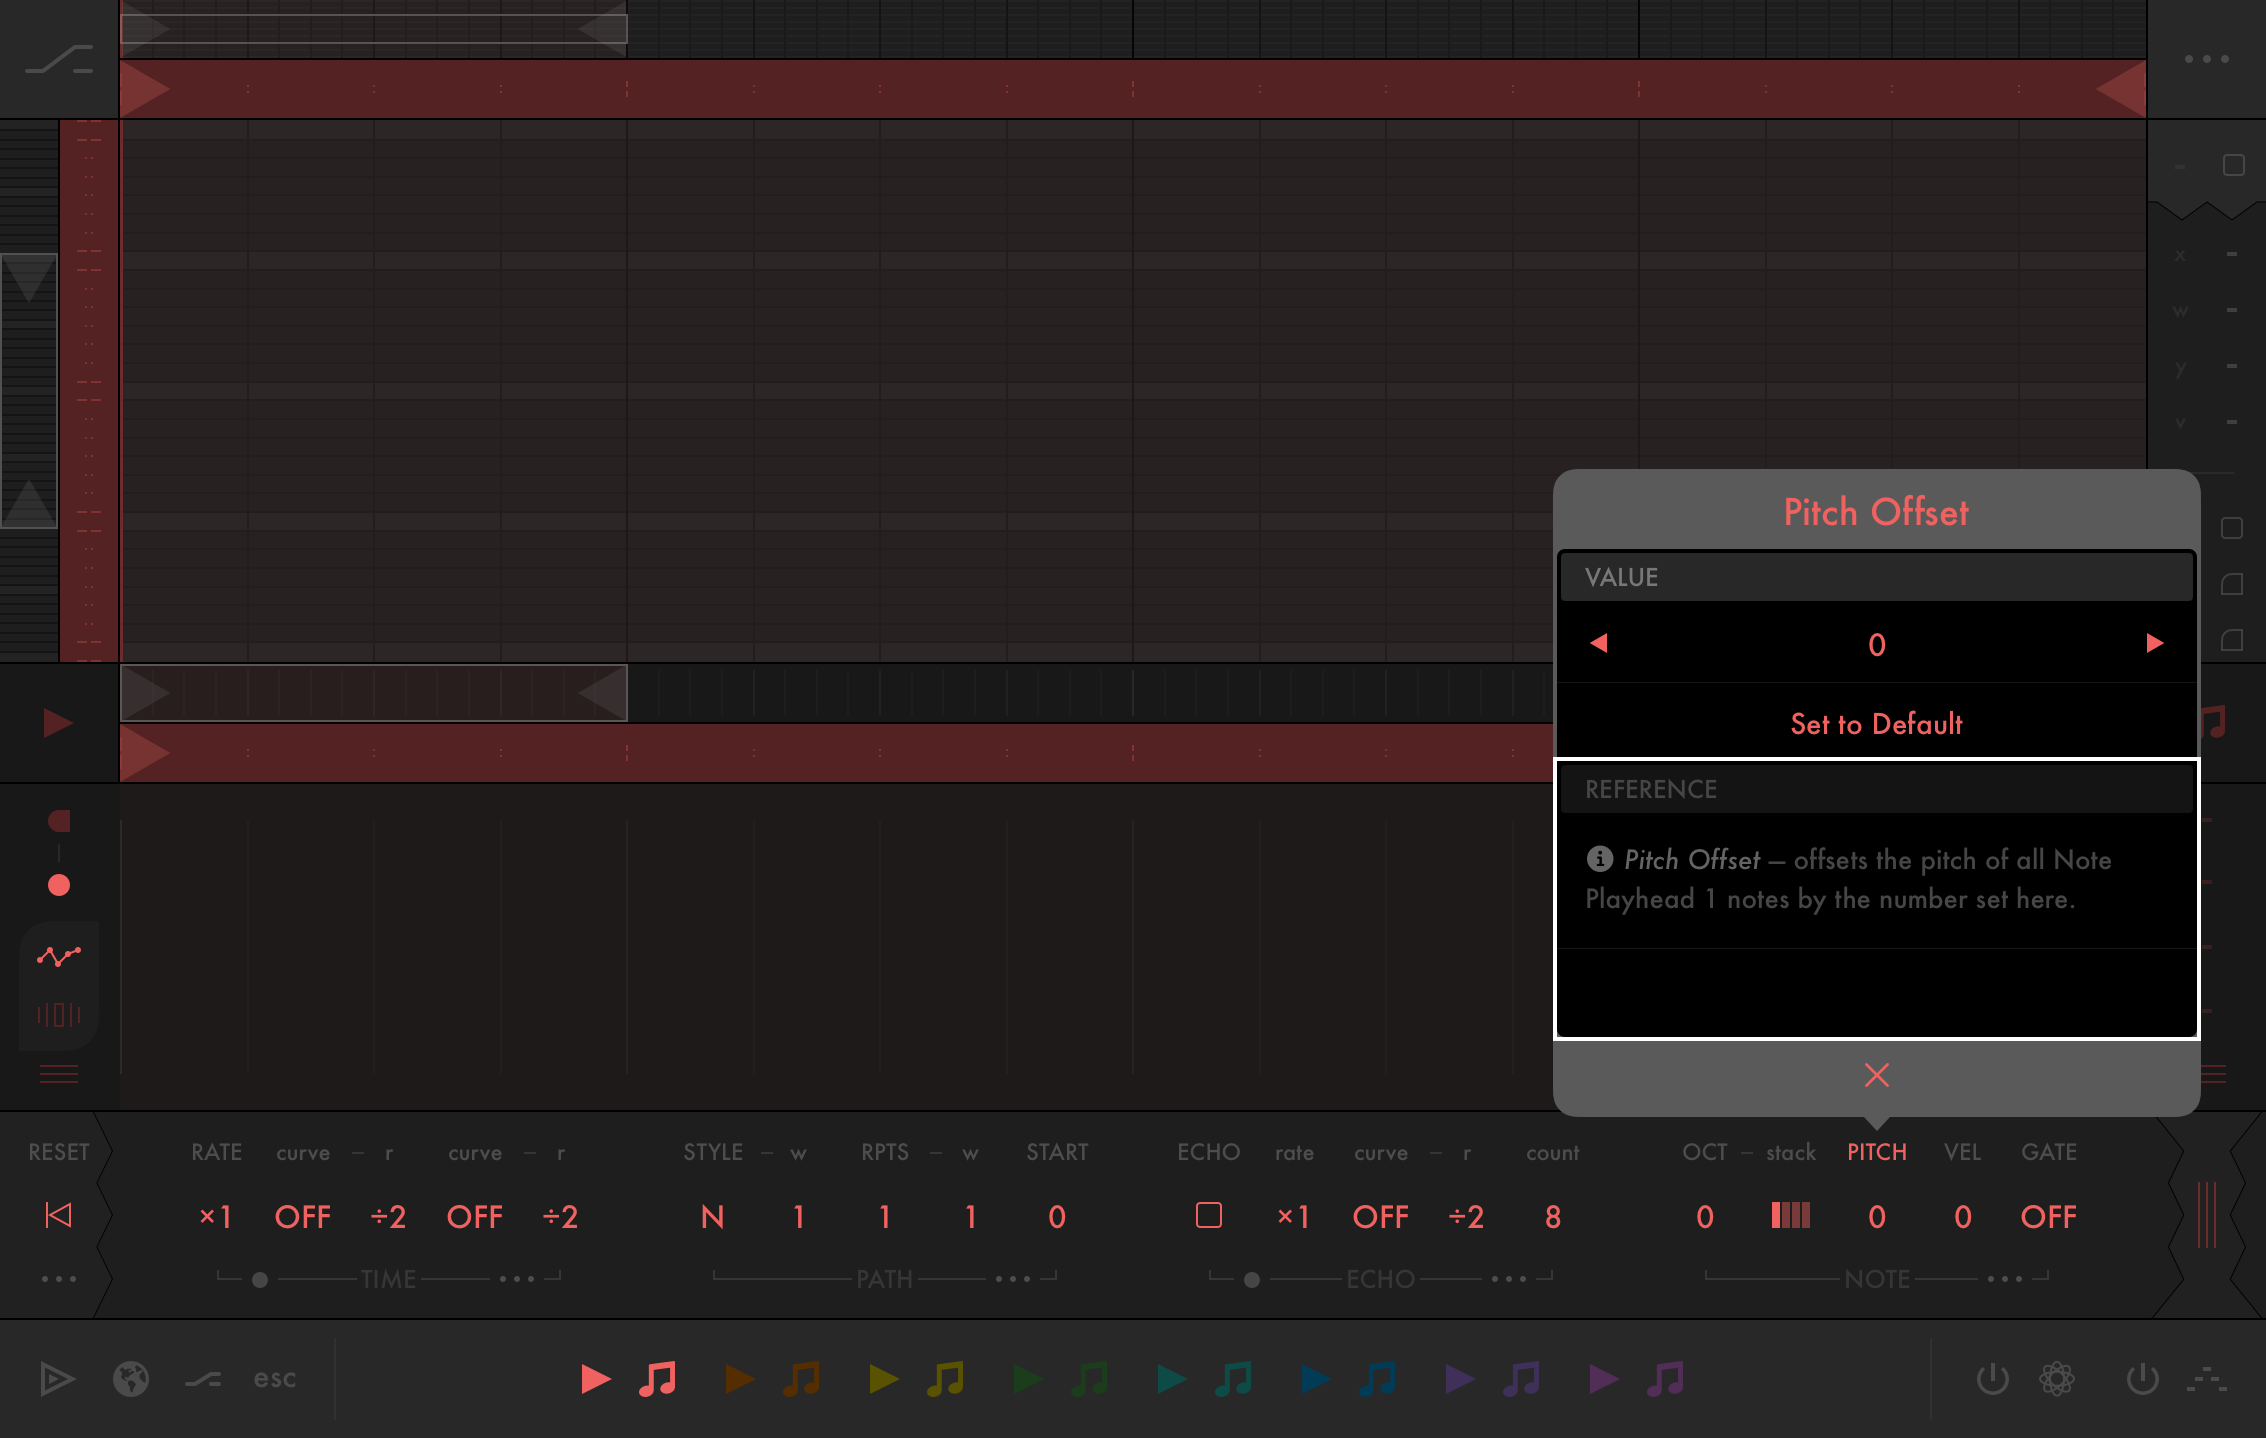
Viewing the built-in reference
- iOS
- macOS
For a main interface parameter
- Apply Single Shift, tap the parameter's title to show its popover, then scroll down to the "Reference" section.
For a popover parameter
- METHOD 1 — scroll down to the "Reference" section on the page you see the parameter.
- METHOD 2 — tap the parameter's title (if it has one) to segue to its own popover page, then scroll down to the "Reference" section there.
For a parameter on the Main Interface
- METHOD 1 — secondary-click the parameter's title to show its popover, then scroll down to the "Reference" section.
- METHOD 2 — apply Single Shift, click the parameter's title to show its popover, then scroll down to the "Reference" section.
For a parameter within a popover
- METHOD 1 — scroll down to the "Reference" section on the page you see the parameter.
- METHOD 2 — tap the parameter's title (if it has one) to segue to its own popover page, then scroll down to the "Reference" section there.
Tempo Parameters
The tempo parameters are located in the Tempo page:
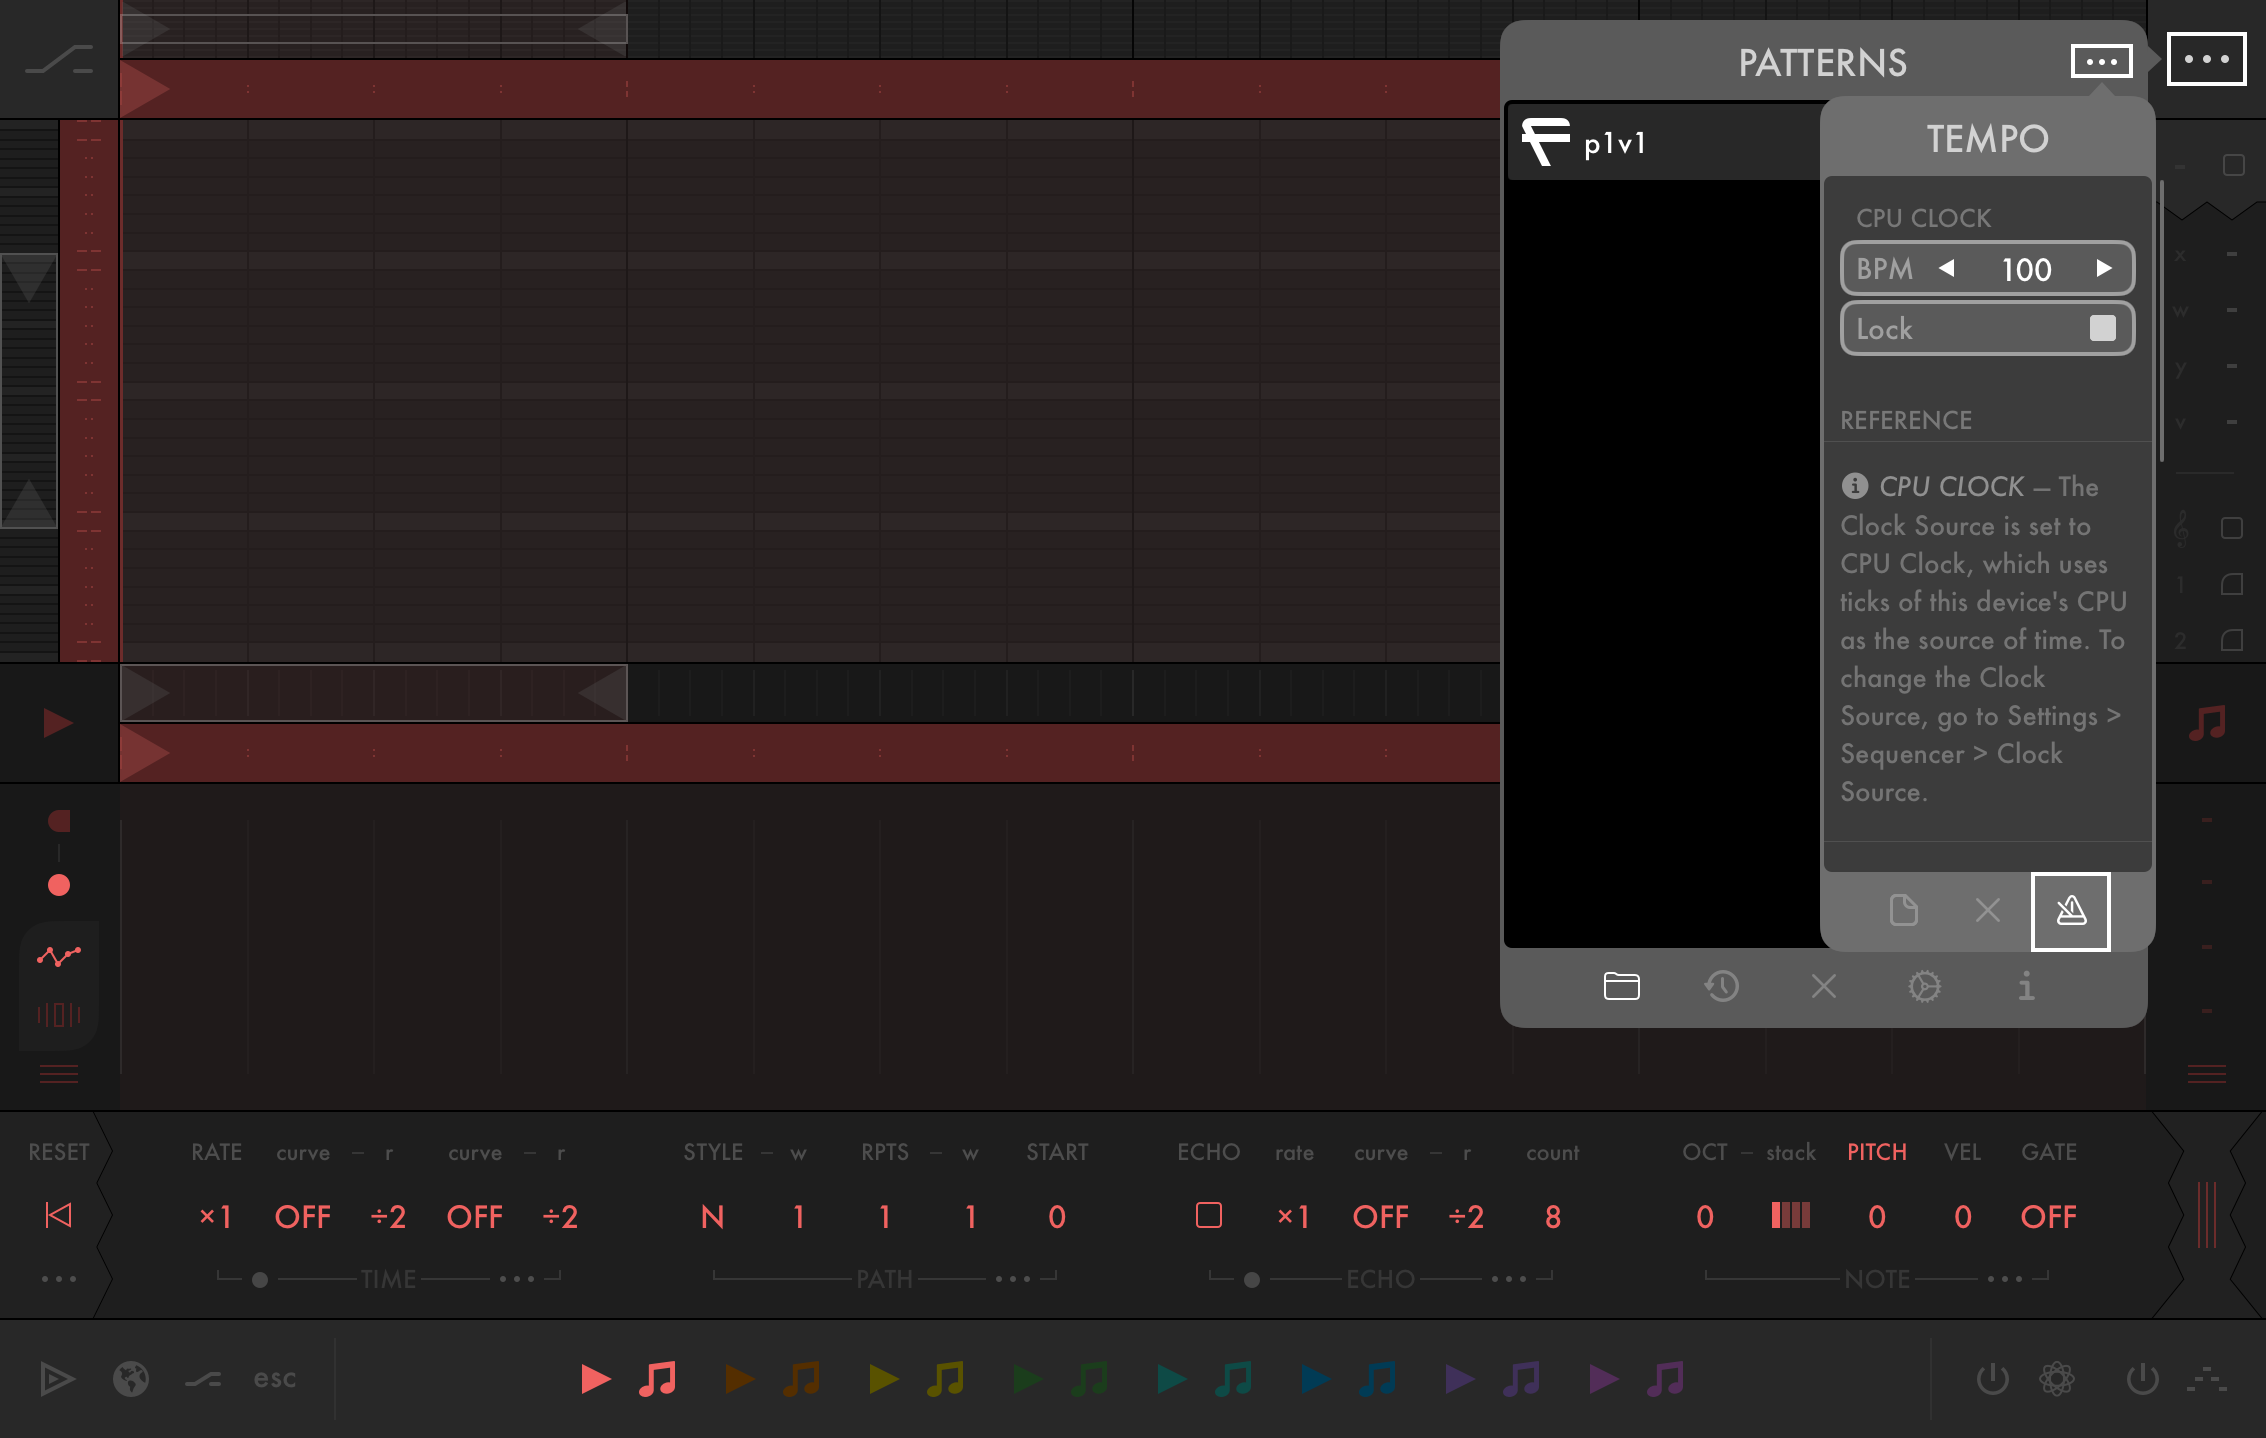
BPM
Sets the tempo for the active Clock Source in beats per minute.
Lock
When set to ON, when you load a pattern, the currently set BPM is locked and won't change to the pattern's stored BPM. When set to OFF, when you load a pattern, the BPM is changed to the pattern's stored BPM.
If a pattern is stored without a BPM value, which can happen when Clock Source is set to MIDI Clock and no clock data has been received, the BPM will not change even if Lock is set to OFF.
File System
The file system is accessible via the top-right More Button, using both the Main Popover and the Secondary Popover:
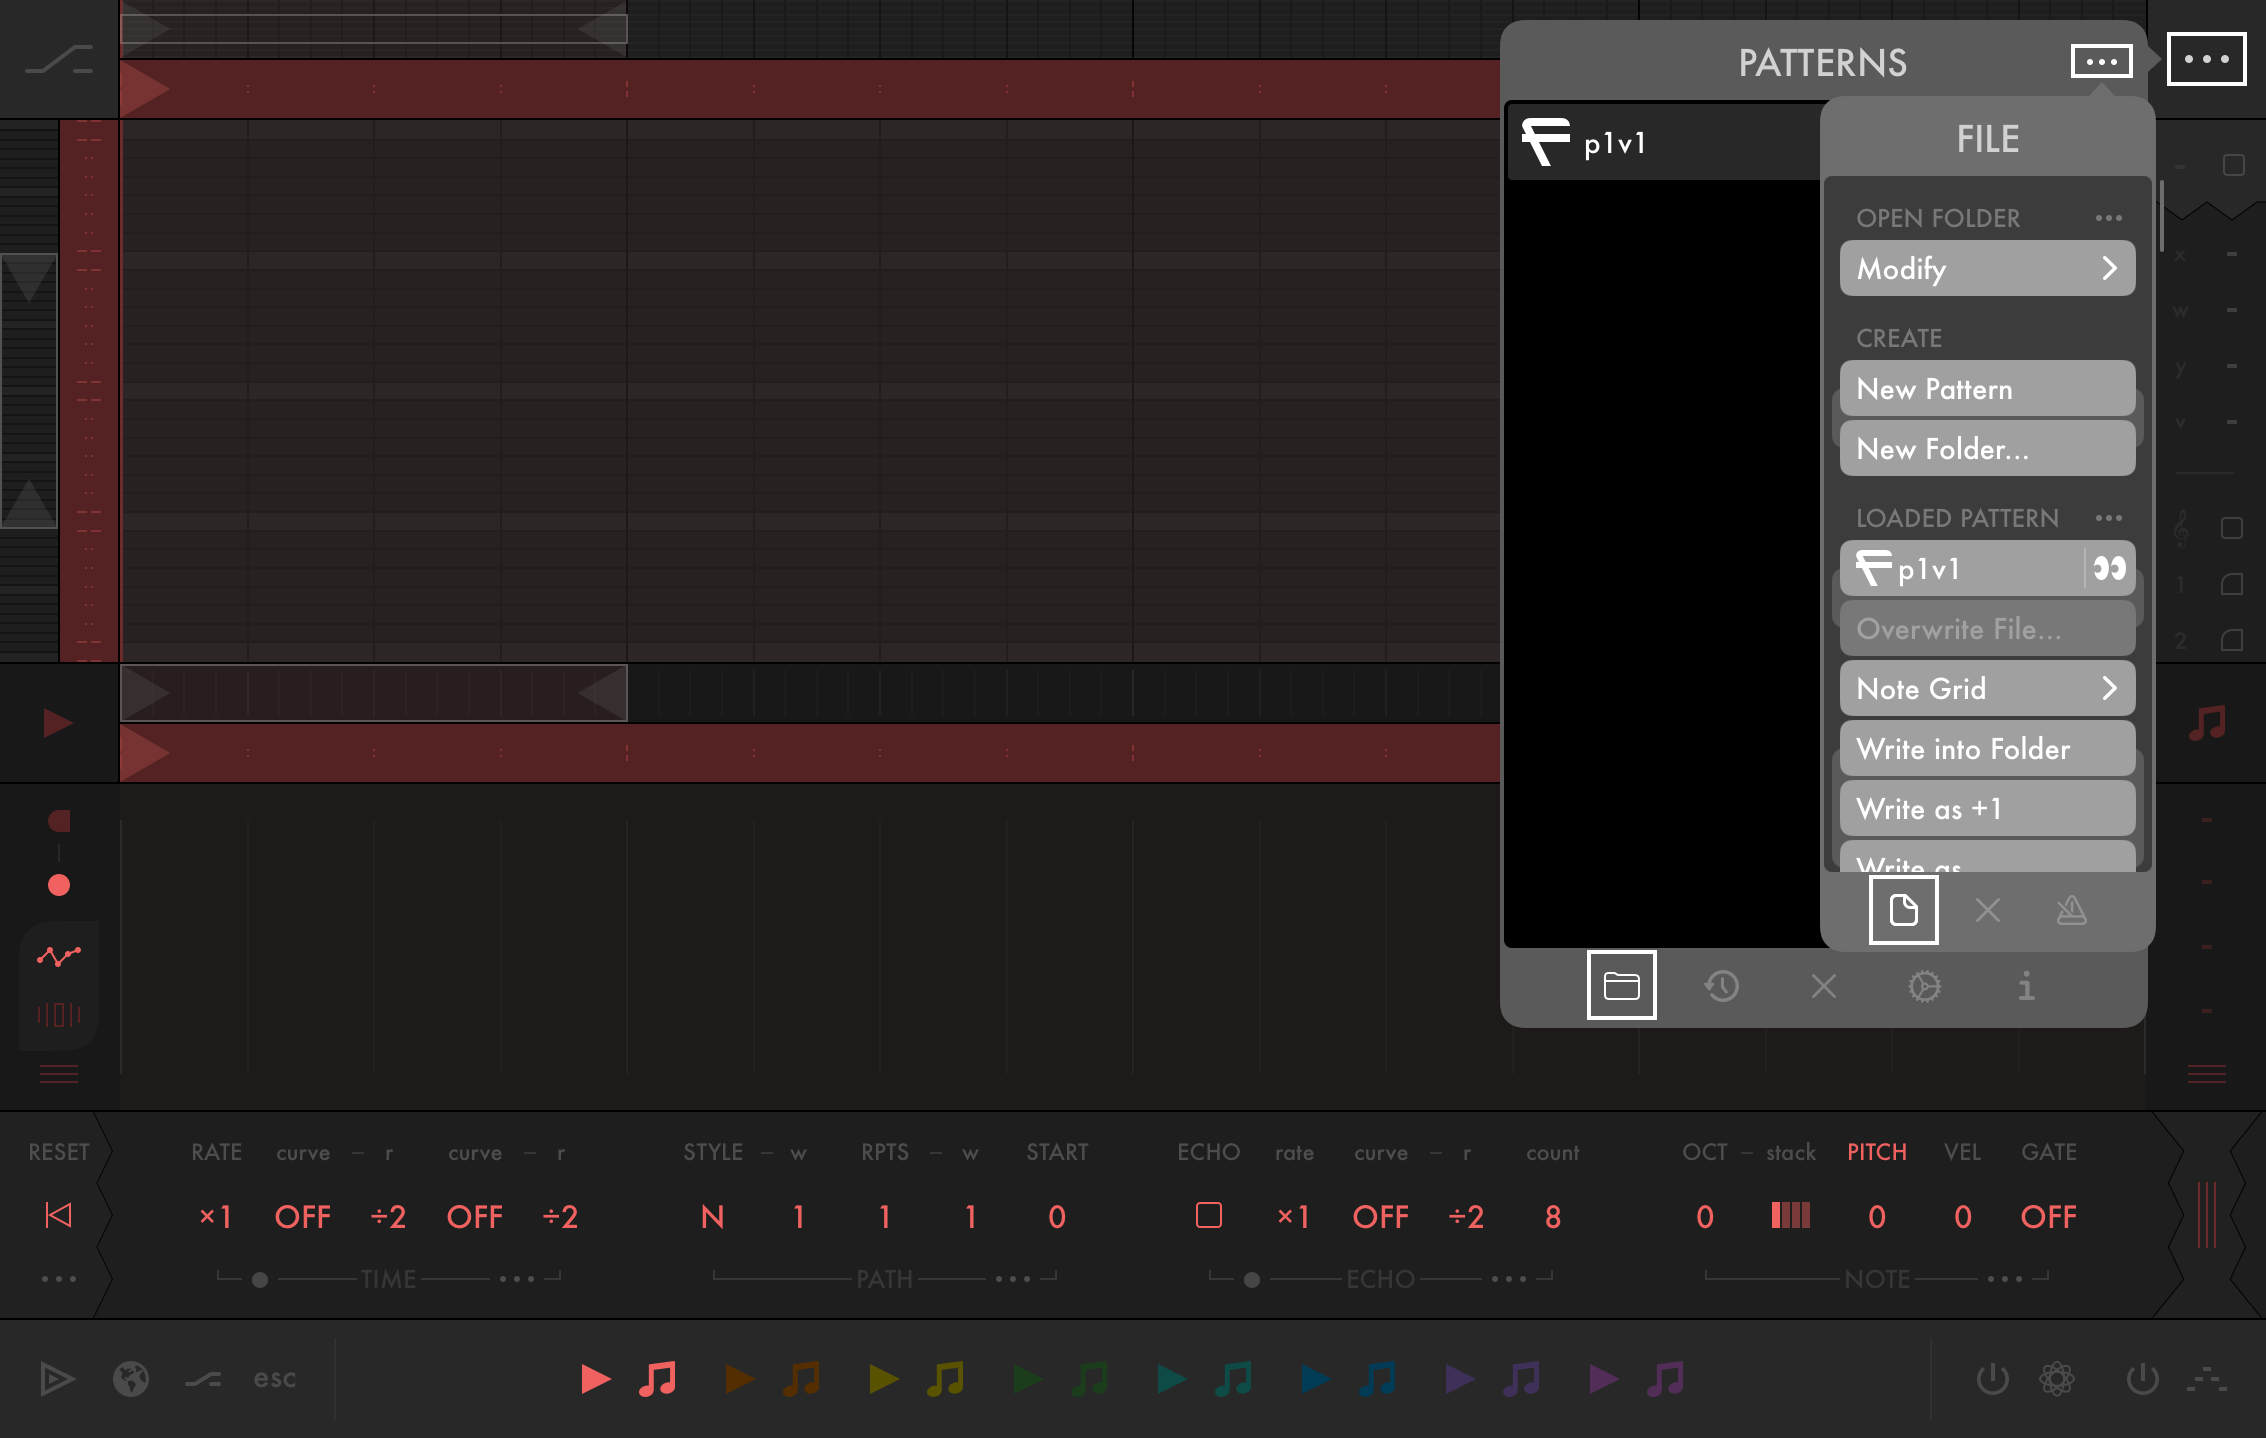
File System Interactions
View the Pattern Library
- Tap the leftmost button in the Main Popover's bottom toolbar — the folder icon.
Create a new pattern
- Tap the New Pattern button in the Secondary Popover.
New patterns are created without a persistent file. If you want to store your pattern, you must write it into a folder within the Pattern Library.
Create a new folder
- Ensure the Main Popover is presenting the Pattern Library.
- Tap the New Folder... button in the Secondary Popover.
Overwrite the Loaded Pattern's source file
- Tap the Overwrite File... button in the Secondary Popover — the button then becomes the Are you sure? button.
- Tap the Are you sure? button to confirm.
The Overwrite File... button is only enabled if the Loaded Pattern is associated with a file, and if the Loaded Pattern has been modified compared to that file.
Overwriting the source file is destructive. A copy of the original file is added to the Snapshots page as a temporary safety mechanism.
Write the Loaded Pattern to a new file
- Ensure the Main Popover is presenting the Patterns Library.
- Tap one of the following buttons in the Secondary Popover:
Write into Folder
Writes the Loaded Pattern immediately into the Open Folder, using the same name of the Loaded Pattern — even if that name already exists inside the Open Folder.Write as +1
Writes the Loaded Pattern immediately into the Open Folder with an incremented name. For example, if the loaded pattern is 'p1', it will write 'p2'. Hold Shift while hitting this button and it will write p1v2.Write as...
Writes the Loaded Pattern immediately into the Open Folder, then presents a rename dialog. If you cancel the rename, the Loaded Pattern will still have been written.
Drum Trigs
Drum Trigs provide an intertwined drum programming workflow that allows you to assign drum triggers to Sequence Notes on the grid. When a Sequence Note is triggered, the enabled Drum Trigs trigger too.
To setup drum trigs.
-
Go to More Menu > Settings > MIDI Output > Drum Trigs.
-
Set the Drum Trigs MIDI Destination to the MIDI Port that a drum machine (or any other MIDI device) is connected to.
-
For each Drum Trig you want to assign: tap its associated cell, then set its Sends MIDI Note Pitch to the pitch you want to send to the receiving MIDI device.
For example, if the MIDI device is a drum machine that has a kick and it triggers the kick whenever it receives MIDI Pitch C1 (36), set Drum Trig 1 to Send MIDI Note Pitch C1 (36).
Please consult the MIDI Implementation Chart of the receiving MIDI device to determine which pitches it uses.
-
In the Note Grid, select a Sequence Note.
-
In the Note Parameters View, set the drumTrig-Enabled toggles you want to enable.
Continuing the example from step 3, if you were to now set drumTrig1-enabled to ON, whenever the selected Sequence Note is triggered, it would also trigger the drum machine's kick.
MIDI Routing
Playheads and effects can be routed to any or all of 8 MIDI outputs.
Setup:
- Go to Settings > MIDI Output, then set MIDI Out 1-8 to the MIDI ports/channels you'd like to be able to send notes to.
- For each playhead/effect, go to its routing page and enable the outputs you'd like it to like to send to.

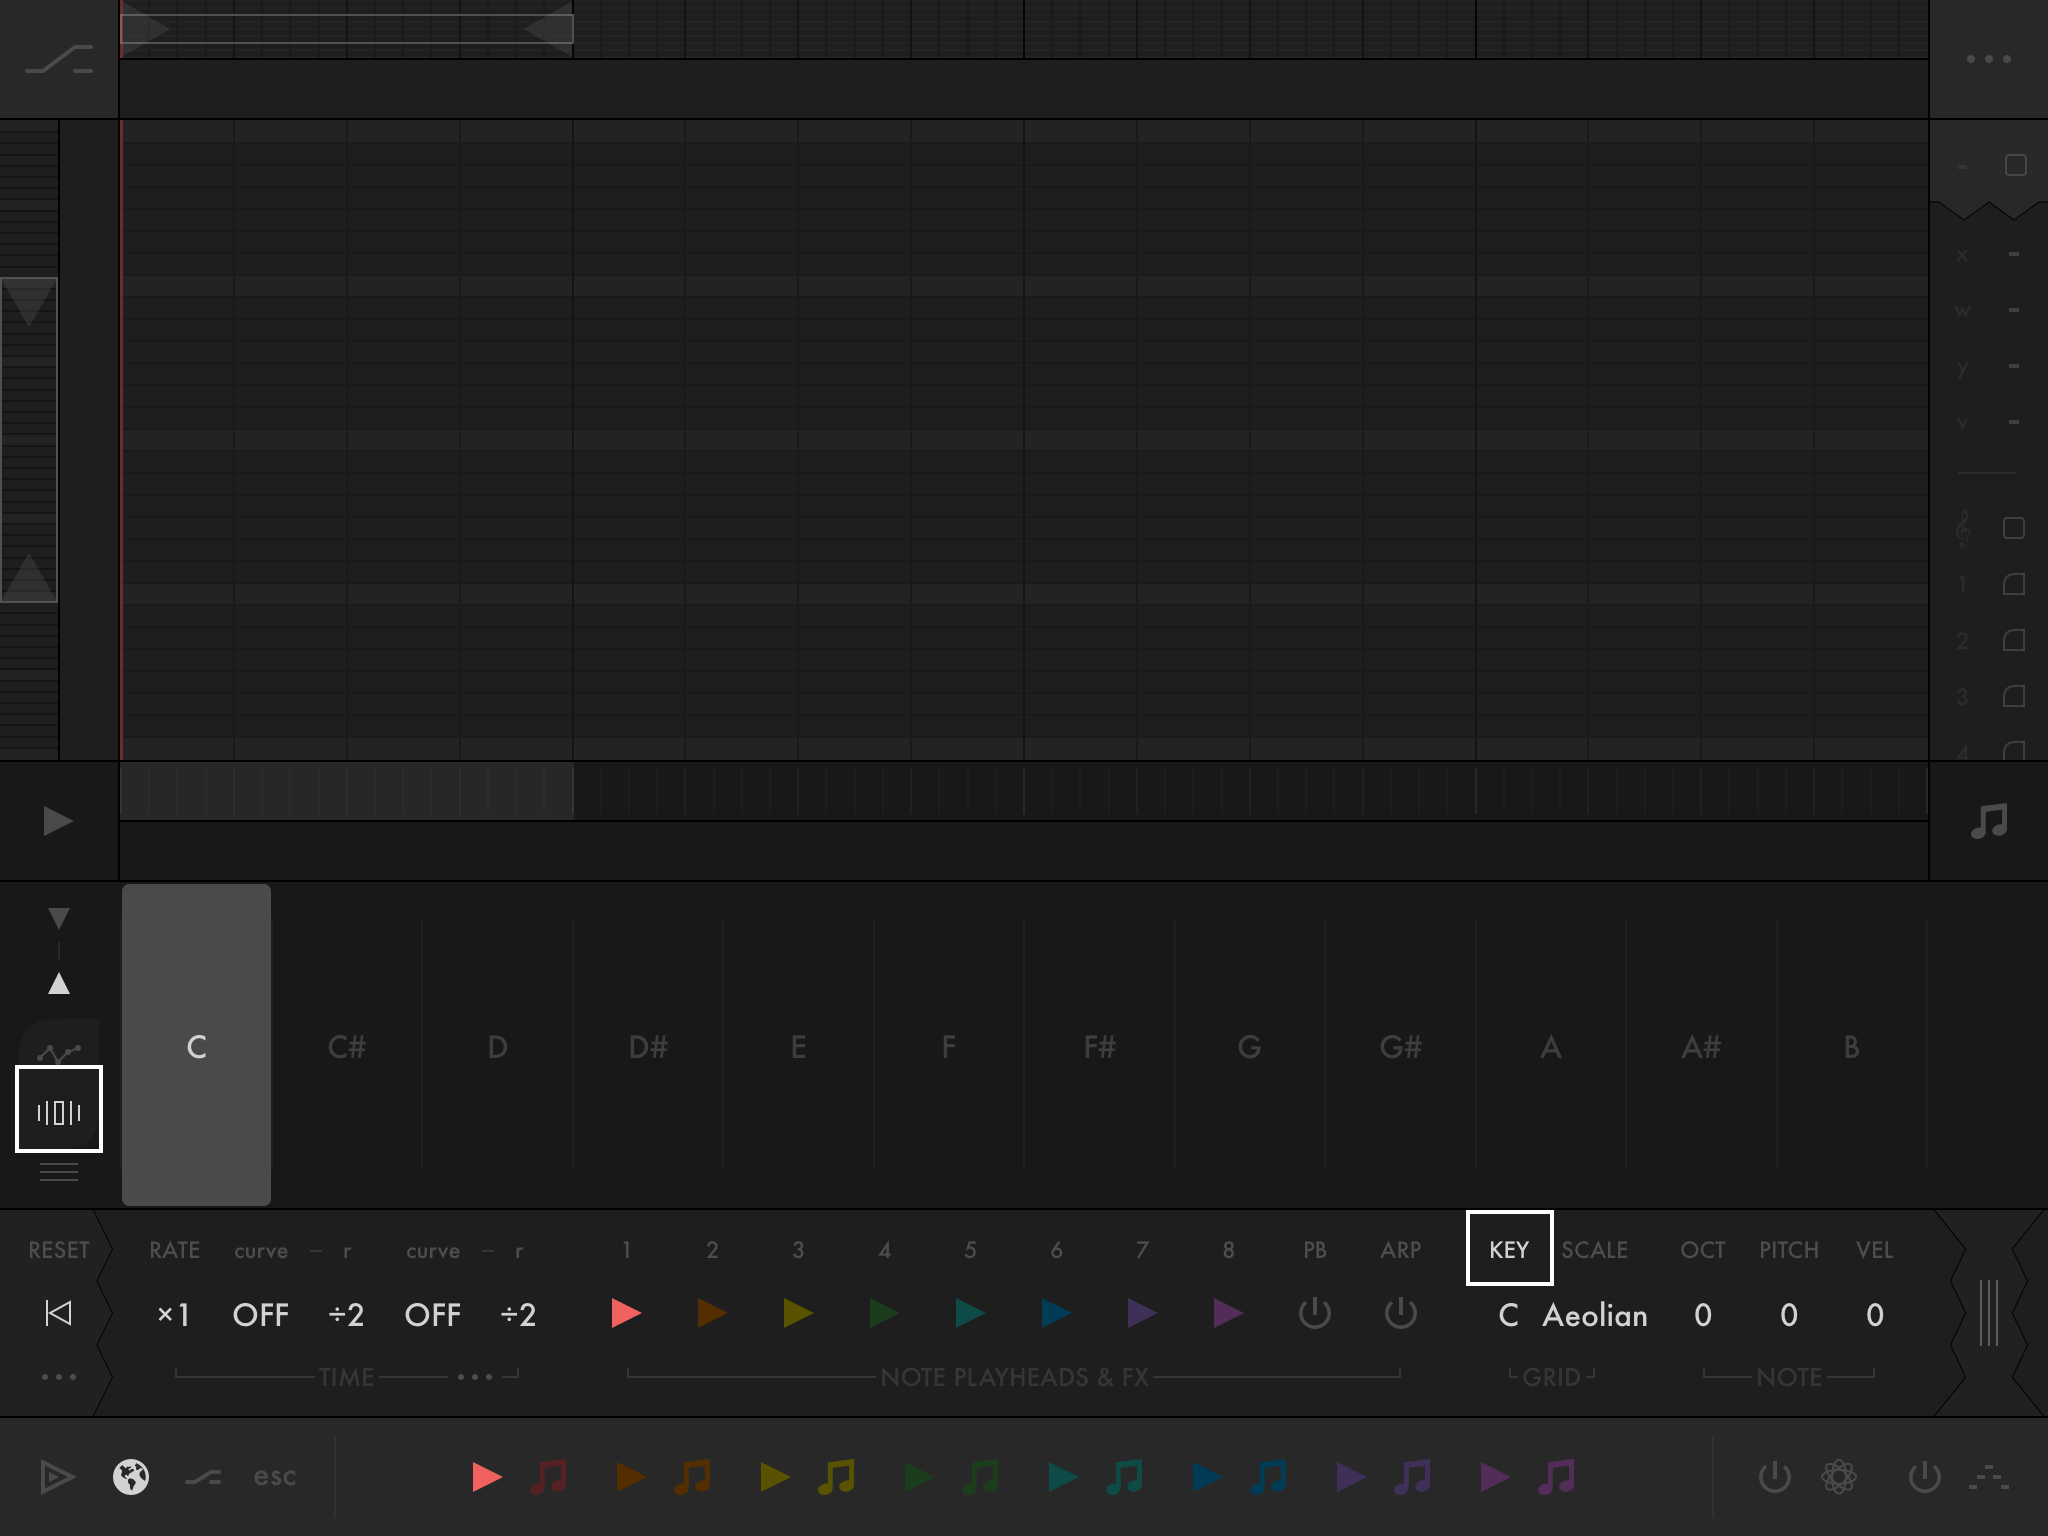
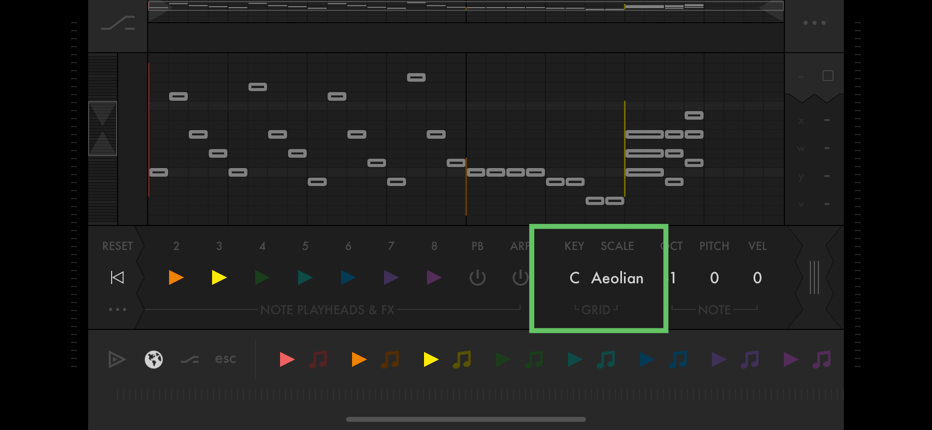
Key and Scale
Key and Scale are located in the Global Module. Custom scales coming soon.
Note Automation
To automate a note's x/y position, width, velocity, and more:
- Select a single Sequence Note in the Note Grid.
- Tap the title of any of the parameter in the Note Parameters View to show its Parameter Control View.
- Tap the Automation Track's Play button, located at its top left corner.
Parameter Keyboard
Each parameter on the main interface can be controlled with the Parameter Keyboard. To show the Parameter Keyboard:
- Tap the title of a parameter to show its Parameter Control View.
- Tap the Parameter Keyboard button on the left side of the Parameter Control View.